
As reliance on digital documents increase in our modern era, document scanning with your mobile phones is becoming an essential tool for professionals, students, and businesses. We’re past the time where we have to rely on bulky scanners. That’s because your iPhone is truly capable of producing high-quality digital scans with a single press of a button. In this article, you’ll learn the step-by-step process on how to scan documents on iPhone.
Why Use Your iPhone to Scan Documents?
Now, you might be asking yourself this question: why should I use my iPhone to scan documents? Surprisingly enough, scanning documents with your iPhone has some notable benefits and it produces just as good of a result compared to when you use a dedicated scanner.
Mobility and Convenience
First is the portability and ease of use. Your iPhone gives you the ability to scan documents anywhere at any time. This is why it’s ideal for professionals and students who are always travelling and need a fast and effective scanning solution. It eliminates the hassle of carrying extra equipment and you can even instantly share your files.
High-Quality Scans
As mentioned before, scanning with your iPhone can produce high-quality results. This is all thanks to the advancements in iPhone camera technology which is considered to be one of the best in the world. Apps also provide additional features such as OCR, auto-edge detection, and image enhancement.
Cost-Effective Solution
Using an iPhone for scanning also removes the need for you to purchase expensive scanners or rely on third-party services. Most scanning apps, including Scanner App offers a free trial plus affordable subscription options that anyone can avail.
Tools for Scanning Documents on iPhone
To effectively scan using your iPhone you need to have the necessary tools. You’ll be amazed to find that your iPhone has a built-in scanner but there are better options in the market. Below we’ll discuss each option and compare them to find out which one is best for you.
Built-In iPhone Scanner: Notes App
Apple has already provided a built-in scanning feature in the Notes app. This makes it convenient for users who just want simple scans without having to download additional app. It’s a very basic solution yet it offers decent scanning quality along with sharing options and edge detection. However, it does lack OCR capabilities.
Scanner App
For users that want higher-quality scans, Optical Character Recognition (OCR), cloud storage integration, and security options, then third-party apps like Scanner App is your best option. Scanner App stands out because of its professional grade document management capabilities that employs the help of AI.
Notes App vs Scanner App Pros & Cons
| Feature | Notes App Scanner | Scanner App |
|---|---|---|
| OCR Support | No | Yes |
| Auto-Edge Detection | Yes | Yes (AI-Powered) |
| Cloud Integration | Limited | Google Drive, Dropbox, iCloud, and more |
| Batch Scanning | No | Yes |
| File Format Support | PDF, JPEG | PDF, PNG, TXT, JPG, DOC, etc. |
Step-by-Step Guide to Scan Documents on iPhone
With the Notes App (Built-In Option)
Step 1. Launch the Notes App When using the Notes app, first open the app on your iPhone and tap on the new note icon. This is to create a dedicated space for your newly scanned files for easier organization.
Step 2. Select “Scan Documents” Next, select the camera icon and then tap on “Scan Documents” from the menu. This is to activate the iPhone’s document scanner tool and for you to prepare it for the optimal scan.
Step 3. Align Document and Capture Hold your iPhone over the document and make sure it fits the frame. The auto-detection feature will then highlight the edges and once it’s aligned, click on the shutter button to start scanning.
Step 4. Adjust, Save, and Share You can adjust by cropping the edges or apply filters to increase the readability. Once you’re satisfied with the results you can save the document as your preferred file format and then share it via email, messages, or cloud storage.
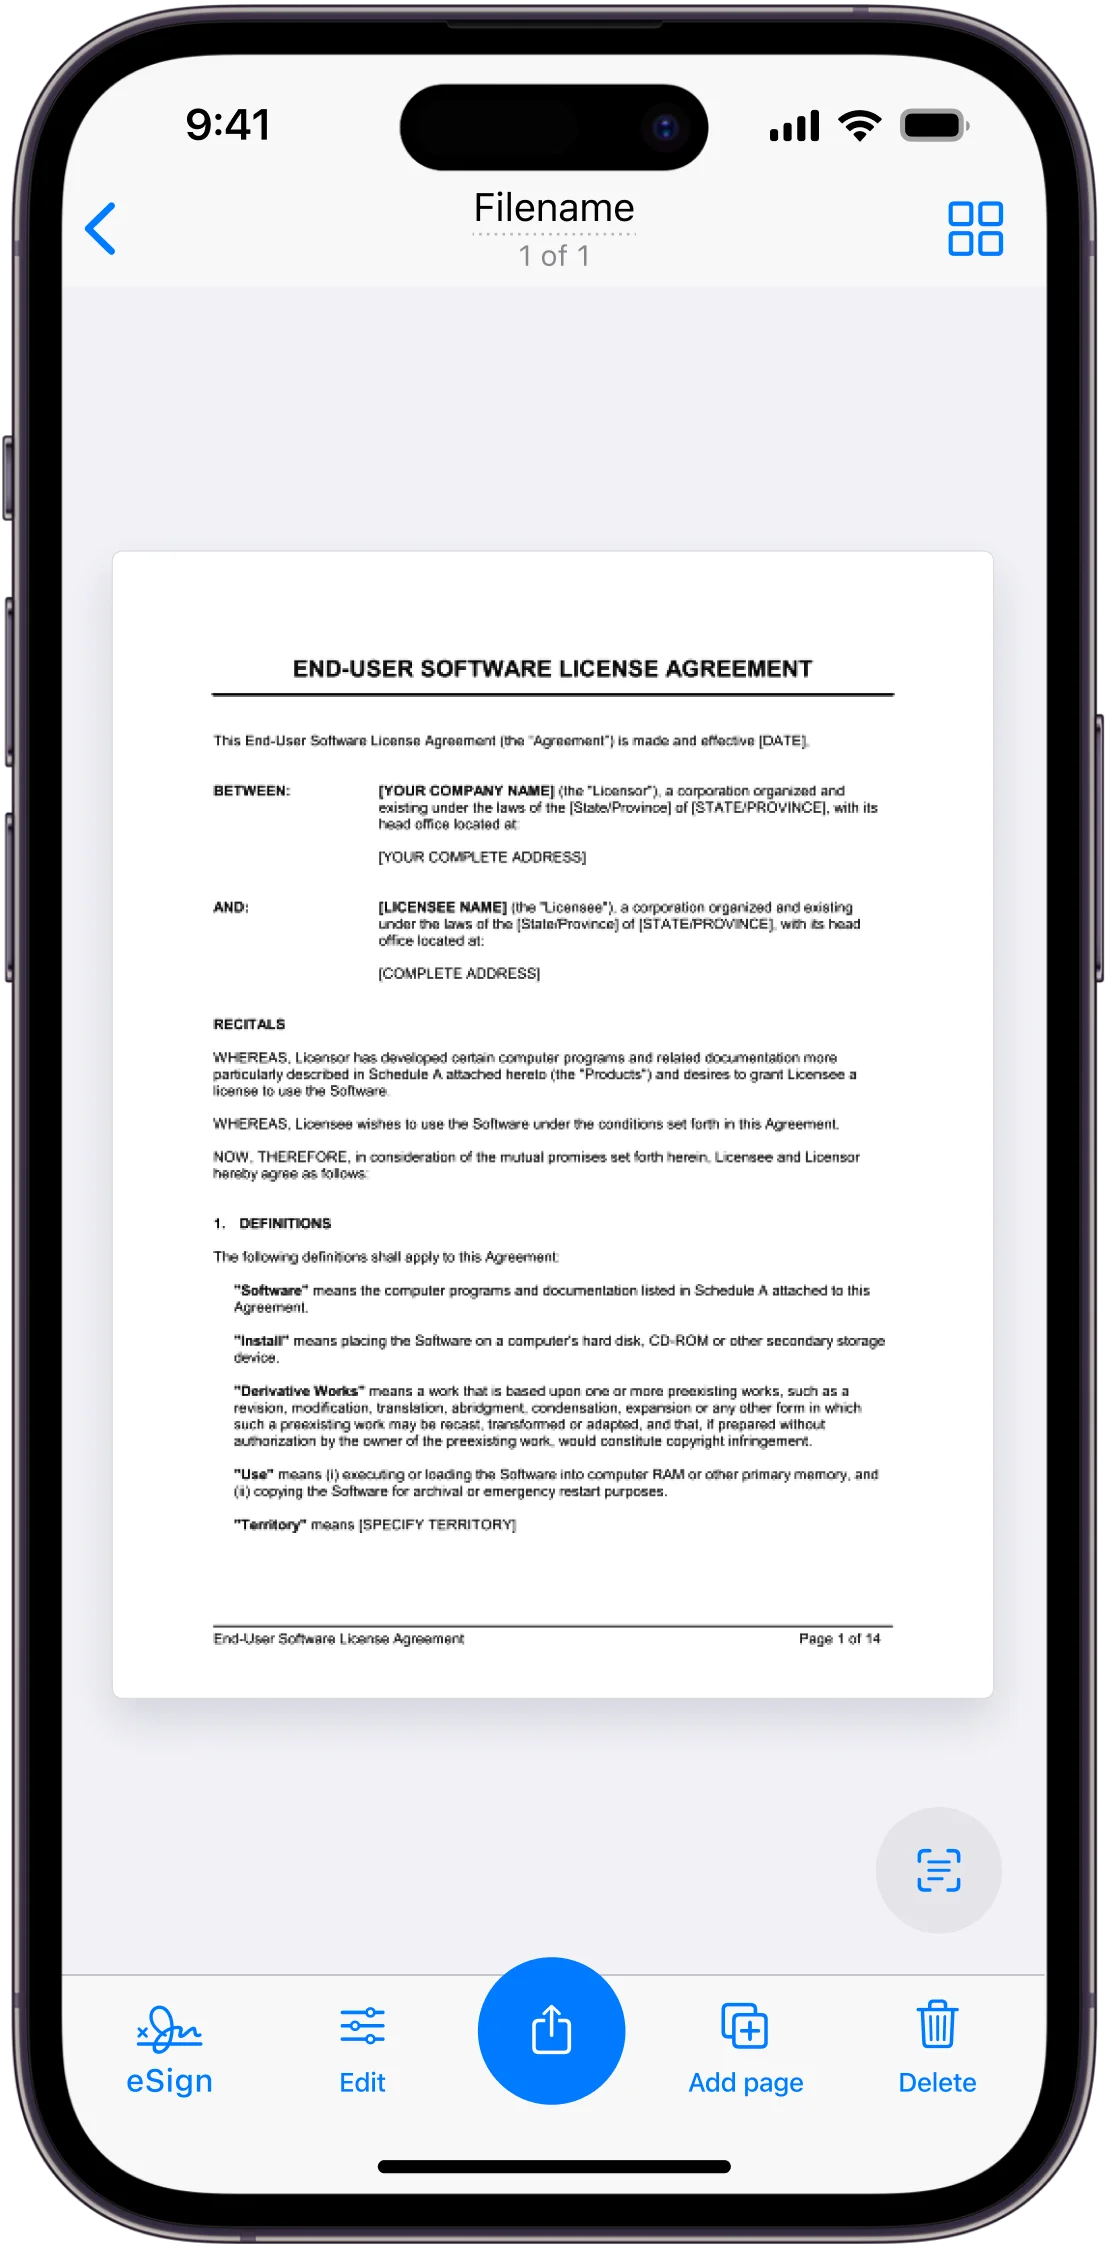
Using Scanner App
Step 1. Download and Install Scanner App Before we begin, you must first open the app store and download the Scanner App or go to the official website of Scanner App in your browser. After installing, give the app the necessary permissions to start.
Step 2. Open and Tap on “New Scan” Launch Scanner App and then select the “New Scan” button to start scanning a document. This will lead you to the camera, giving you the ability to capture high-quality images.
Step 3. Align Document With the camera set, align your iPhone over the document and let Scanner App’s AI-powered edge detection do the work for you. You won’t have to manually adjust to capture the edges, saving you time.
Step 4. Apply Filters Once you’ve successfully scanned the documents, you can adjust the brightness, contrast, and sharpness of the scan. This ensures that the text is clear even with poor lighting. You can even convert the scan to black and white for better visibility.
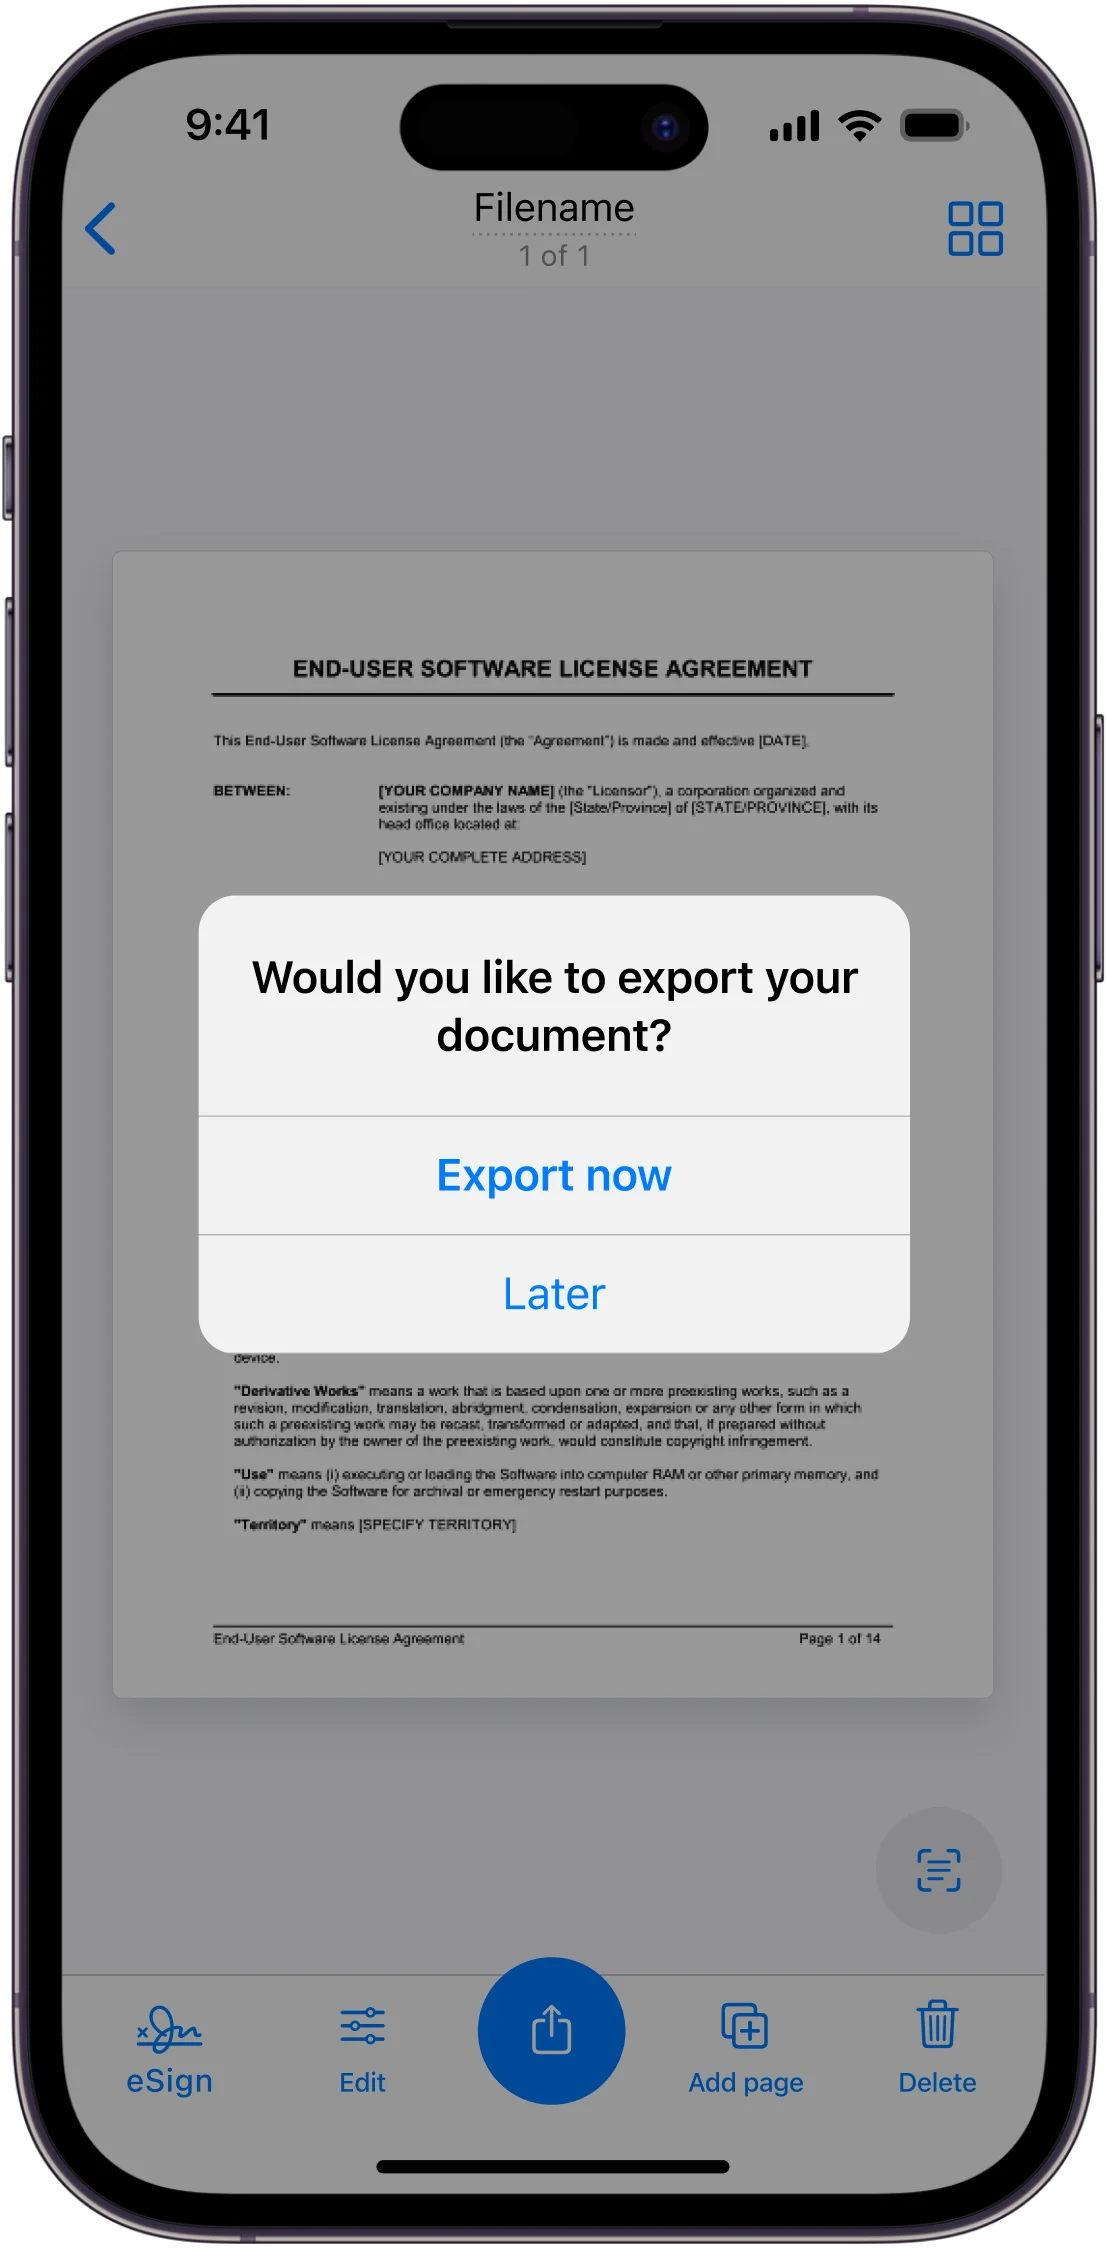
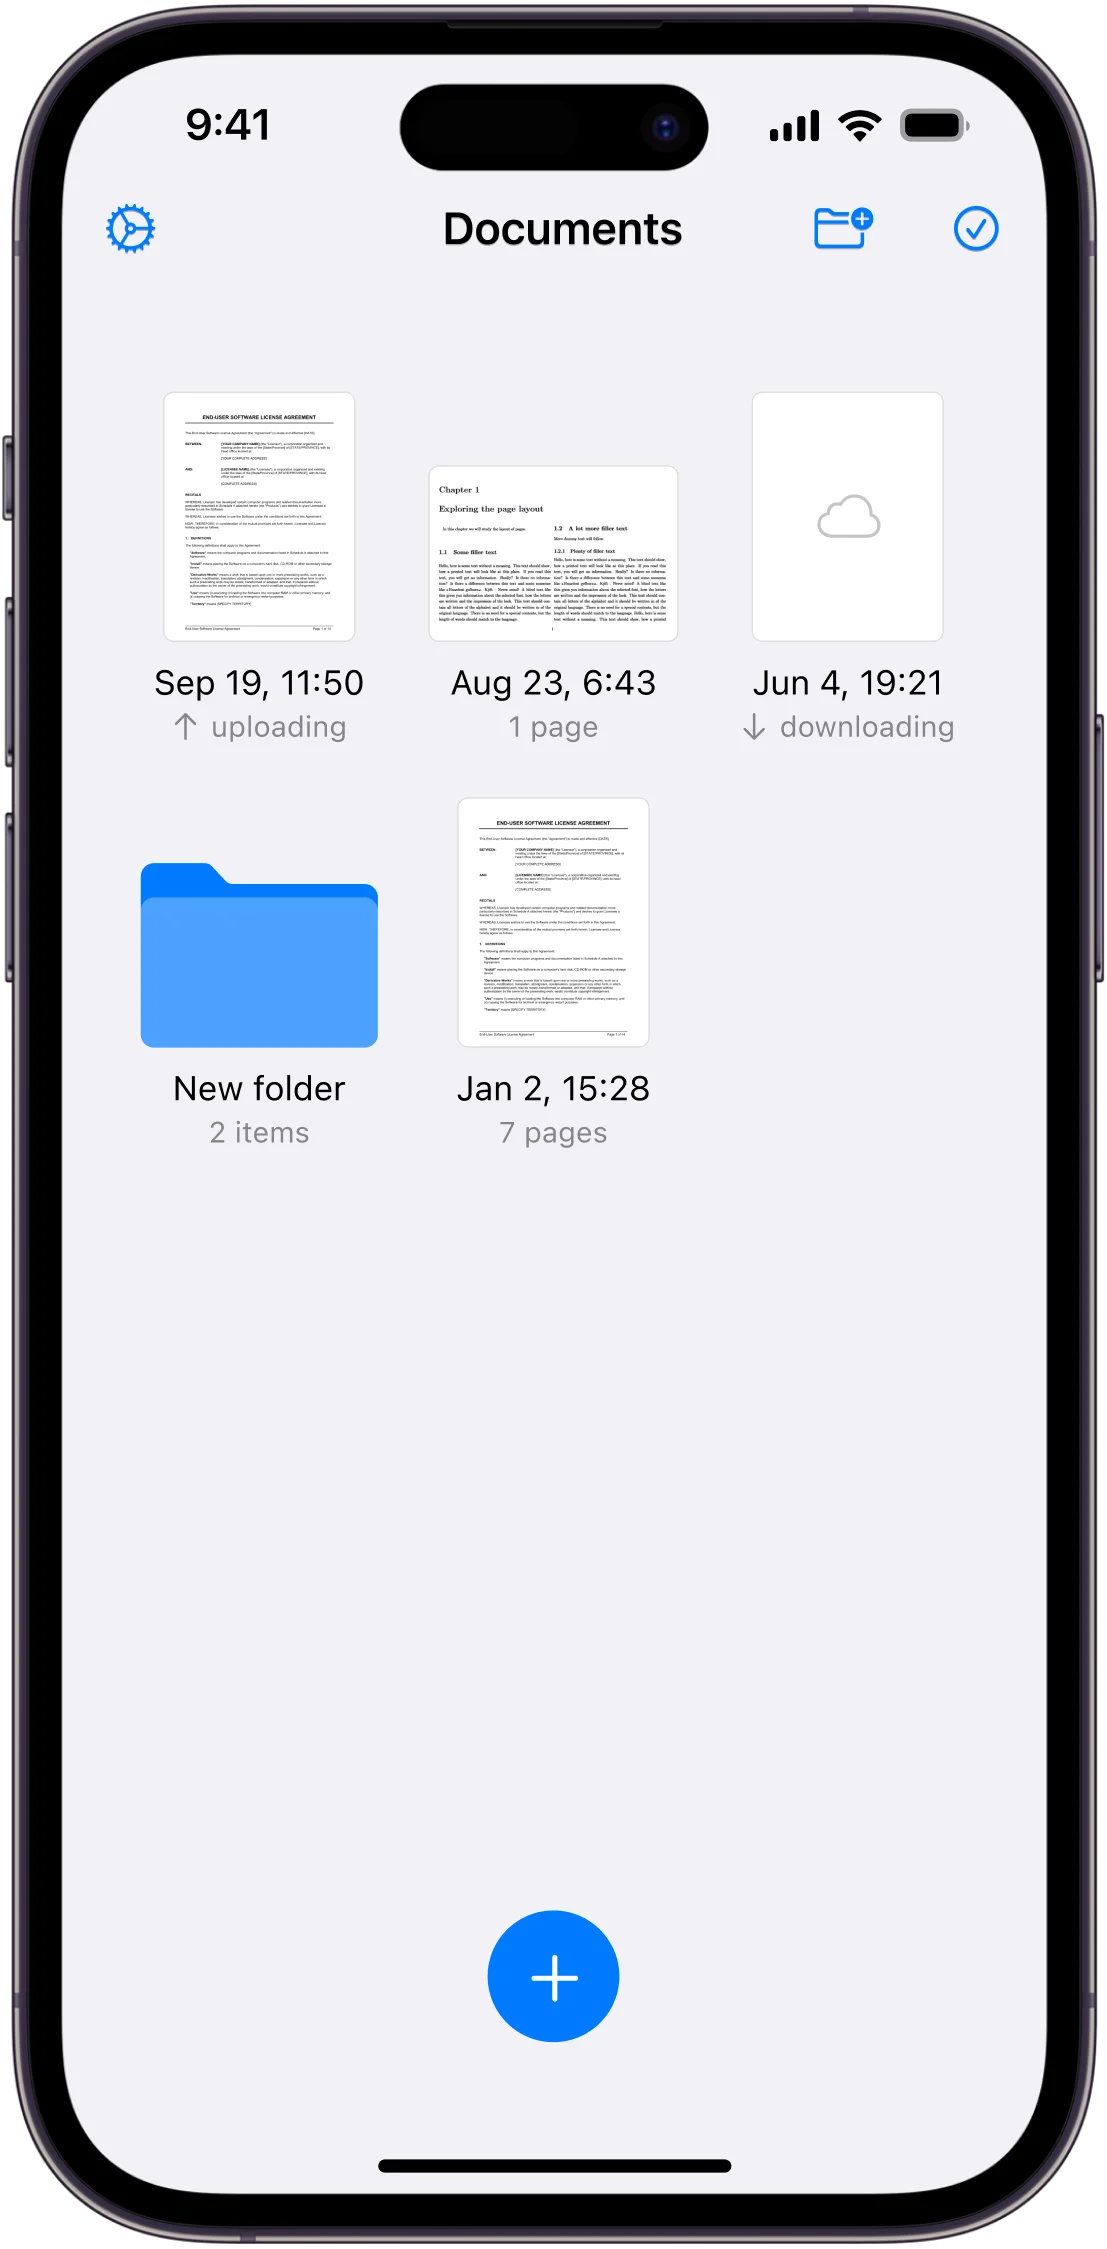
Step 5. Save, Organize, and Export Finally, after everything is set and done, choose from the multiple file formats and save your scan. You can sync your files with cloud storage platforms like iCloud or Google Drive so you can access them across multiple devices. In addition, you can encrypt the files before sharing them with others.
Frequently Asked Questions
Is Scanner App free to use? After downloading form the App Store, Scanner App offers you a free trial after which you will be given the option to choose one of its many affordable subscription plans.
Can I scan a document with my iPhone and email it? Yes. You can definitely scan a document with your iPhone and email it. After scanning it with Scanner App, you can share it easily with your colleagues or classmates.
How do I scan a picture as a PDF on my iPhone? In order to scan a picture as a PDF on your phone, first you should download Scanner App. Then, tap on “New Scan”, align the document to the camera, make the necessary adjustments, and then save as PDF.
Conclusion
While it may not be obvious, your iPhone is a powerful tool for scanning documents. You never need to by expensive scanners again. While the Notes app is great for basic tasks, apps like Scanner App provide you with a superior experience because of its advanced features. Whether you’re a student, professional, or business owner, try Scanner App now and make sure your document scanning process is fast and secure.